Installing a transceiver module the right way helps networks work well. It also ensures they last a long time. Using clear steps reduces mistakes and yields good results. The five steps are: getting ready, placing the device, hooking up cables, testing, and fixing issues. Each step is crucial for the device to perform at its best.
Good transceiver installation setups have transformed many industries. Hospitals improved patient care with faster networks. Schools enhanced online learning with easy content sharing. Stores became better at tracking products and assisting customers. These examples demonstrate how following the steps can lead to outstanding results.
Watching a how-to video can make the transceiver module installation easier. It helps you avoid common errors.
Key Takeaways
Collect all tools and check if they will work together. This step avoids errors and makes the setup easier.
Pick a good spot for the transceiver module to get strong signals. A good location stops interference and improves the network.
Attach power, data, and antenna cables tightly for smooth use. Check the connections again to avoid problems later.
Test the transceiver module after setting it up to ensure it works. Testing often helps find issues early and keeps the network strong.
Take care of the transceiver module by cleaning and updating it. Regular care makes it last longer and work better.
Step 1: Getting Ready for Optical Transceiver Installation
Tools and Supplies You’ll Need
Before you start, gather all tools and supplies. You’ll need items like a noise filter, a good power source, and antennas that fit your setup, such as VHF/UHF or HF wire antennas. Strong patch cables are important for good connections. For example, using cables like PL259-N MALE helps keep data steady. Also, have lint-free wipes and cleaning tools for fiber optics to keep signals clear.
Checking the Transceiver Module and Setup Area
Checking the transceiver module and setup area is very important. First, look at the transceiver to spot any damage, bent pins, or loose parts. Use a microscope to check the optical end-face for dirt or dust. At the setup area, make sure the network gear is off and the area is static-free. Use tools to test power levels and signal strength. Do an SFP loopback test to make sure the transceiver module works before moving on.
Making Sure It Matches Your Equipment
The optical transceiver must match your network equipment to work well. Check details like size, speed, wavelength, and connector type. For example, a universal transceiver should match the network port’s speed in Gbps and meet standards like IEEE8023. Use a chart to compare details:
Type of Spec | What It Means |
|---|---|
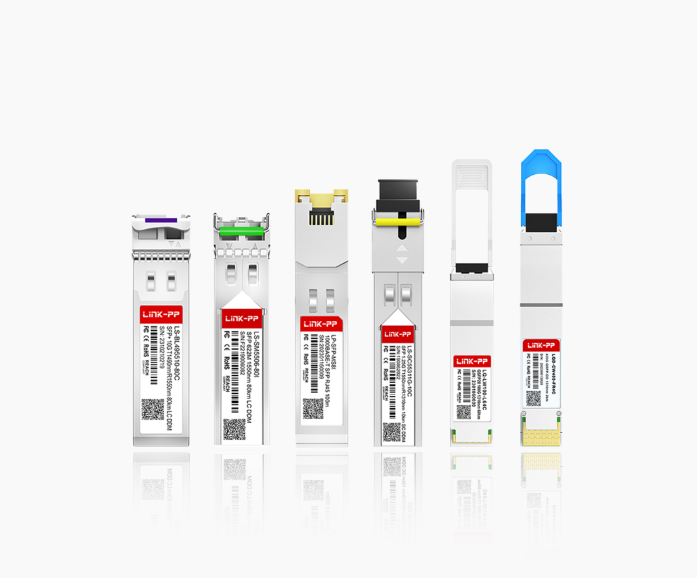
Size | SFP, SFP+, QSFP, etc. |
Speed | Matches network port speed |
Wavelength | 850nm for multimode, 1310nm/1550nm for single-mode |
Connector Type | LC, SC, MTP/MPO connectors |
Standards | Meets IEEE8023 rules |
Testing everything together avoids errors and helps things run smoothly. Checking early saves time and effort later.
Step 2: Placing the Transceiver Module
Picking the Best Spot
Finding the right spot for your transceiver is very important. A good location gives strong signals and steady connections. First, think about your setup needs, like the building type and use. For example, in a big office, place the transceiver in the center for even coverage.
To get the best signal, follow these tips:
Keep the Received Signal Strength Indicator (RSSI) at -67 dBm or better. This level works well for most uses.
Make sure the Signal-to-Noise Ratio (SNR) is 25 dB or higher. This helps avoid interference and keeps communication clear.
Don’t put the transceiver near big metal objects or electronics. These can mess up the signal.
How you arrange your setup also affects the signal. For example:
Setup Type | What It Does | Effect on Signal |
|---|---|---|
Many Receivers in Uneven Square | Helps with accurate geolocation | Reduces location mistakes |
Bad Receiver Placement | Three in a straight line | Causes unclear results |
Transmitter Inside RF Receiver Network | Best for geolocation accuracy | Accurate up to twice the baseline range |
Choosing the right spot lowers mistakes and boosts the transceiver’s performance.
Securing the optical Transceiver Module the Right Way
After picking the spot, secure the transceiver properly. This stops damage and keeps it working well. Line up the transceiver with its slot. Push it in gently until it clicks. Don’t push too hard, or you might break it.
Use brackets or clamps to hold it steady. This is key in places with shaking or movement. If it’s in a rack, make sure it’s tightly fixed so it doesn’t move.
Good placement improves accuracy. For example, careful positioning can lower errors to just 2–4 decimeters. This ensures strong data flow and less signal loss.
By securing the transceiver well, you build a strong network that lasts and works reliably.
Step 3: Hooking Up the Cables to the Transceiver Module
Power Cable Setup
The first step is connecting the power cable. This ensures your transceiver module works properly. Find the power input port on the transceiver. Use a power cable that fits the voltage and current needs. For example, the LS-BL332710-20I SFP+ Optical Transceiver Module needs steady power for best performance.
Steps to connect the power cable:
Turn off the power to prevent electrical shocks.
Match the cable connector to the port.
Push the cable in until it clicks securely.
Tip: Check the cable for damage before using it. Broken cables can cause power problems or device failure.
Data Cable Setup
Connecting the data cable correctly helps data flow smoothly. Use good-quality cables, like duplex ones, to double data capacity. This is important for sending clear video in busy networks.
Steps to attach the data cable:
Get tools like an antistatic strap and cleaning items.
Find the latch type on the transceiver module.
Insert the cable into the socket until it locks in place.
Clean the LC connector ends to remove dust or dirt.
Note: MMF optic cables are easier to install because of their larger core size.
Antenna Cable Setup
Hooking up the antenna cable keeps signals strong and reduces interference. Use coaxial cables with good connectors for a stable link. After connecting, test for shorts and continuity with an ohm meter.
Tips for better performance:
Keep RF cables short to avoid signal loss.
Use grease and heat shrink tubing to protect connections from water.
Cover RF ports until you’re ready to connect them.
Tip: Make sure the antenna is mounted securely to improve signal quality.
By following these steps, your Optical transceiver, whether for data or video, will work well and stay reliable.
Step 4: Testing the Transceiver Module Installation
Turning on the Transceiver Module
Turning on the transceiver is an important step. First, check all cables, including power, data, and antenna ones. Make sure they are connected tightly. Then, switch on the power supply. Look at the LED lights on the transceiver. A green light usually means it’s working well. Blinking or red lights might show problems.
Watch the temperature and voltage levels carefully. The transceiver should stay cool and get steady power. For instance, the LS-BL332710-20I SFP+ Optical Transceiver Module needs stable power to work its best. Checking these things helps avoid overheating or power issues.
Tip: If it doesn’t turn on, check the power cable and source again.
Checking Signal Strength and Connection
Testing signal strength ensures the transceiver sends and receives data properly. Use tools like a network analyzer or loopback tester. Focus on these:
dBm: Measures the signal’s power.
RSSI: Checks how good the signal is.
Optical quality metrics: Looks at things like Optical Modulation Amplitude (OMA).
Also, check the transmitter’s wavelength and output shape. For receivers, test jitter tolerance and bandwidth. These checks confirm the transceiver is working well and sending clear data.
Note: A universal transceiver should meet these standards for good performance.
Fixing Common Problems
If something goes wrong, follow the steps to fix it. Common problems include:
Link Connectivity Problems: Make sure the transceiver is fully in its slot and cables are secure.
Signal Loss or Weakness: Clean connectors and check for broken cables.
Compatibility Issues: Confirm the transceiver matches your network equipment.
Module Faults: Look for overheating or internal damage.
Environmental Factors: Fix issues like dust, heat, or humidity.
Testing methods can help avoid failures. For example:
Testing Method | What It Does | Result |
|---|---|---|
Reliability Testing | Check how long the transceiver lasts | Longer working time |
Design Verification Testing | Makes sure the design meets rules | Matches required standards |
Performance Tests | Tests heat, shaking, and power changes | Reduces chances of problems |
By solving these problems step by step, your transceiver will work well and send clear data and video.
Step 5: Final Adjustments for the Transceiver Module
Adjusting Transceiver Settings
Changing your transceiver settings helps it work better. Start by setting the Automatic Level Control (ALC) and Automatic Modulation Control (AMC). These settings make signals clearer and reduce problems. For example, keeping AMC between 40 and 45 in Single Side Band (SSB) mode lowers signal distortion. Wrong settings can cause interference or unclear signals.
Benefits of adjusting settings:
Clearer Signals: ALC and AMC reduce signal problems.
Less Distortion: Good AMC settings keep signals strong.
Longer Device Life: Proper settings protect the device’s parts.
Check the transmitter's return loss and adjust settings as needed. For example, the LS-BL332710-20I SFP+ Optical Transceiver Module allows precise changes for better performance. Always test after making changes to ensure everything works well.
Checking Performance
After adjusting, test the transceiver module to make sure it works well. This step ensures it handles different conditions. Use tools to check transmitter return loss and receiver performance. The table below shows important metrics:
Metric | What It Shows |
|---|---|
Transmitter Return Loss | How well the transmitter sends signals. |
Adjustment Settings | Improves performance for different conditions. |
AIMM Tuning Values | Lowers return loss and improves signal quality. |
Receiver Performance | Boosts receiver function based on transmitter settings. |
After testing, check the transceiver’s durability with special tests. These include heat, shaking, and long-use tests. For example, optical fiber transceivers can last over 20 years with proper adjustments. Tests like vibration and fiber pull confirm the device is strong.
Tip: Keep an eye on performance numbers to ensure the transceiver works well. Regular checks help your network stay reliable.
By finishing these adjustments, you’ll improve the transceiver’s performance and make it last longer for your network.
Maintenance Tips for Transceiver Module
Regular Checks for Damage
Check your transceiver often to keep it working well. Look for bent pins, loose parts, or broken cables. Dirt or scratches on the optical end-face can weaken signals. Use a magnifying glass to check connectors carefully.
Regular maintenance has these advantages:
Benefit | Description |
|---|---|
Smooth Network Operations | Regular checks reduce problems, keeping work running smoothly. |
Lower Repair Costs | Preventing big issues saves time and money. One hour of maintenance can save four hours of fixing problems. |
Better Security | Updates and checks improve security and protect against risks. |
By checking your transceiver regularly, you can stop sudden problems and keep your network reliable.
Cleaning the Transceiver Module and Connectors
Cleaning your transceiver module helps it work its best. Dust, moisture, or particles can cause issues. Use lint-free swabs and gentle cleaners to clean it. Follow these steps:
Wipe the connector end-face with a dry, lint-free swab.
Check the connector after cleaning to ensure it’s spotless.
Don’t use alcohol-based cleaners, as they might harm the surface.
Tip: Cover unused ports with caps to keep them clean.
Cleaning often stops signal problems and helps your transceiver last longer. Watching a short video can show you how to clean it properly.
Updating Firmware and Software
Updating firmware improves your transceiver’s performance and fixes problems. Many transceivers allow updates without stopping traffic. The table below explains firmware updates:
Aspect | Details |
|---|---|
Firmware Update Process | CMIS sets rules for updating firmware without removing transceivers. |
Why Updates Matter | Fixes bugs found during testing or use. |
No-Traffic Impact Updates | Some transceivers update without affecting data flow. |
For instance, the LS-BL332710-20I SFP+ Optical Transceiver Module supports updates that boost performance and fix compatibility issues. Always check for new updates in software releases. Keeping your transceiver updated ensures it works well and stays secure.
Monitoring Performance and Addressing Issues
Watching your transceiver’s performance helps it work well and last longer. Regular checks find problems early, stopping them from getting worse. This keeps your network strong and your equipment in good shape.
Check important diagnostics often. Look at things like transmitted power, received power, temperature, and voltage. These numbers show how healthy your transceiver is. For example, if the received power drops suddenly, it might mean a dirty connector or a broken cable. Fixing these problems quickly avoids bigger issues.
Use CLI commands to check transceiver details and spot problems fast. For instance, you can see if the temperature is too high. High heat might mean poor airflow or too much work. Fixing this right away keeps the transceiver steady.
Collecting and studying performance data is also important. This helps you notice patterns and predict issues. For example:
Transmitted Bias Current: Shows if the laser diode is working well.
Received Power: Tells you how clear incoming signals are.
Power Supply Voltage: Make sure the transceiver gets enough power.
By keeping track of these, you avoid downtime and improve reliability.
Tip: Check performance regularly to catch problems early. Early fixes save time and money.
Monitoring your transceiver isn’t just about fixing things. It’s about keeping your network running smoothly. Regular checks and quick fixes keep your transceiver in great shape.
Using the 5 steps for transceiver setup makes it easy. First, gather tools and check if everything matches. Next, place the transceiver in a good spot and secure it. Carefully connect all cables to avoid damage. Test everything to make sure it works. Lastly, tweak the settings for better performance.
Good installation and upkeep make networks last longer. For instance, non-OEM modules may cost less at first. But without care, they can cost more over time. Regular checks and updates keep your network safe and running well.
By following these steps, you prevent errors and create a strong, lasting network.
FAQ
What tools are needed for transceiver module installation?
You’ll need simple tools like screwdrivers and lint-free wipes. Use an antistatic wrist strap to avoid static damage. For fiber optics, add cleaning tools and a magnifying glass. A loopback tester checks if connections work properly.
Tip: Keep tools close by to save time while working.
How can you check if a transceiver module is compatible?
Look at the transceiver’s details. Match its size, speed, wavelength, and connector type to your network gear. Make sure it follows standards like IEEE802.3.
Note: Compatibility helps the transceiver work smoothly without problems.
Why is it important to clean the transceiver module?
Dust and dirt can block signals and lower performance. Cleaning ports and connectors keeps data flowing clearly. Use lint-free wipes and proper cleaning tools.
Tip: Cover unused ports with caps to keep them dust-free.
What should you do if the transceiver module isn’t working?
First, check all connections. Make sure the transceiver is inserted fully and the cables are tight. Clean the connectors and confirm compatibility. If it still doesn’t work, use a loopback tester or replace it.
How often should the transceiver module maintenance be done?
Check and clean your transceiver every three to six months. Regular care prevents damage and keeps it reliable. Update firmware when new versions come out.
Reminder: Regular maintenance avoids problems and makes the transceiver last longer.
See Also
Exploring Wavelength Selective Switches Used In ROADMs
A Guide To LAN WDM Fundamentals For 2025