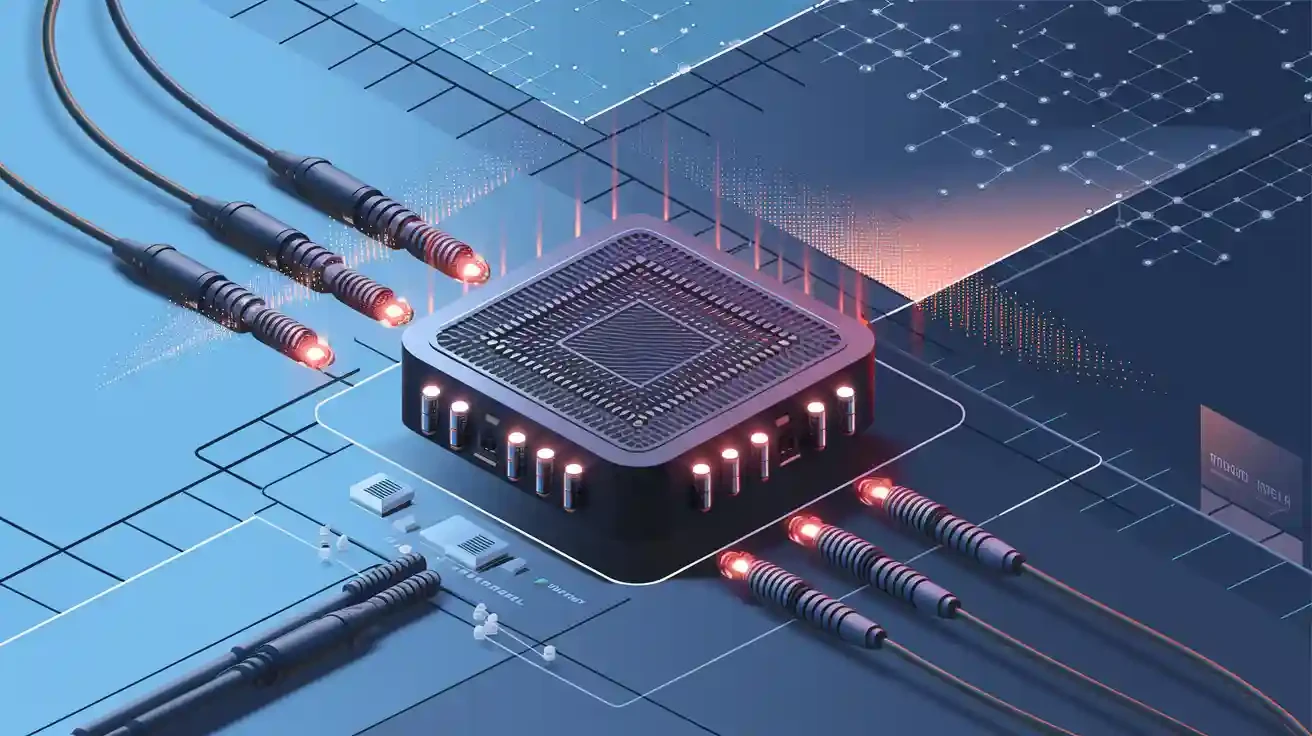
Small Form-factor Pluggable modules (SFP module) are the workhorses of modern network connectivity, enabling flexible fiber optic or copper links between switches, routers, firewalls, and servers. Whether you’re upgrading bandwidth, replacing a faulty unit, or reconfiguring your topology, knowing how to safely install or remove SFP modules is a fundamental skill for any network administrator. Mishandling these sensitive optical components can lead to port damage, link failures, or even permanent transceiver failure. This guide provides detailed, professional steps to ensure you perform these tasks correctly every time, minimizing downtime and maximizing your hardware investment. We’ll also explore the advantages of using reliable brands like LINK-PP for consistent performance.
➤ Why Correct Handling Matters
Preventing Damage: SFP modules contain delicate optical components and electronics. Electrostatic discharge (ESD) or physical mishandling can destroy them instantly.
Ensuring Reliable Connections: Improper insertion can cause poor contact, leading to intermittent links or performance degradation.
Maintaining Port Integrity: Forcing a module or using excessive pressure can damage the expensive SFP cage (port) on your switch or router.
Personnel Safety: While generally low-power, laser-based modules require awareness to avoid potential eye exposure (though modern Class 1 modules are eye-safe under normal operation).
Essential Safety Precautions & Tools
ESD Protection: ALWAYS wear a properly grounded ESD wrist strap connected to a verified grounding point. Work on an ESD-safe mat if possible.
Handling: Hold modules by the sides or metal cage. Never touch the gold-plated electrical contacts or the optical bores (on fiber modules).
Dust Caps: Keep protective dust caps on optical modules and fiber optic cable connectors until the moment you are ready to connect them. Dust and contamination are major causes of link failure.
Required Tools: Typically none, unless a retaining clip or latch mechanism requires a small flat-head screwdriver (less common in modern designs). Have lint-free wipes and approved fiber optic cleaning tools ready for optical interfaces.
Identify Module Type: Ensure you have the correct module (e.g., 1G SX, 10G SR, 25G SR, 100G SR4, Copper T) for your port and intended cable/media. Check vendor compatibility lists if unsure. LINK-PP SFP modules undergo rigorous compatibility testing.
Key Takeaway: SFP safety precautions, ESD protection networking, fiber optic cleaning, SFP compatibility, network transceiver handling
➤ How to Install an SFP Module (Step-by-Step)
Prepare:
Power down the device if possible, especially if hot-swap is not explicitly supported or verified. If hot-swap is supported, proceed with caution.
Put on your grounded ESD wrist strap.
Have the SFP module ready with its dust caps securely in place.
Visually inspect the device port and the optical module for any obvious damage or debris.
Orient the Module:
Identify the alignment key on the SFP module (a small groove or ridge on one side). Match this to the keyway inside the device’s SFP port. SFP modules only fit one way.
Insert the Module:
Carefully slide the SFP module straight into the port slot. Apply firm, even pressure directly along the horizontal axis.
Do not rock, twist, or force the module. If significant resistance is felt, stop, remove the module, recheck the orientation, and inspect the port.
Push the module all the way in until you feel it seat firmly and hear or feel a distinct “click.” This indicates the latch mechanism has engaged. On some modules, you might need to gently push a latch down after initial insertion until it clicks.
Secure (If Applicable):
Some devices (especially routers or older switches) use a small screw or bail latch to secure the module. Tighten the screw snugly but do not overtighten, or engage the latch if present.
Connect the Cable:
Only after the module is fully seated and secured, remove the dust caps from the module’s optical bore(s) and from your fiber optic cable connector(s).
Immediately clean the fiber connector end-faces using approved click-type cleaners or lint-free wipes and pure isopropyl alcohol.
Align the connector key (e.g., the tab on an LC duplex connector) with the slot on the SFP module and push straight in until it clicks. Never look directly into an active fiber port.
Verify Operation:
Power on the device if it was off.
Check the device’s management interface (CLI, Web GUI) for link status on the port.
Observe the LED status indicator adjacent to the SFP port (if equipped). Green/amber usually indicates link status and activity (refer to device docs).
Keywords Integrated: install SFP module, SFP insertion steps, SFP port orientation, fiber connector cleaning, SFP link verification, hot-swap SFP
Recommended LINK-PP Modules for Common Applications:
Application | LINK-PP Model | Description | Key Advantage |
|---|---|---|---|
Gigabit Multimode | 1000BASE-SX, 850nm, 550m on OM2 | Cost-effective, reliable | |
Gigabit Single Mode | 1000BASE-LX, 1310nm, 10km+ | Long reach, versatile | |
10G Multimode (SR) | 10GBASE-SR, 850nm, 300m on OM3 | High-density, low power | |
10G Single Mode (LR) | 10GBASE-LR, 1310nm, 10km | Standard for 10G metro access | |
10G Copper (T) | 10GBASE-T, 30m (Cat6a) | UTP infrastructure reuse | |
25G Multimode (SR) | 25GBASE-SR, 850nm, 70m/100m OM3/OM4 | Next-gen data center speed | |
High-Perf 100G | 100GBASE-SR4, 850nm, 100m OM4 | Ideal for core switching & AI/ML clusters |
➤ How to Remove an SFP Module (Step-by-Step)
Prepare:
Ideally, gracefully shut down the interface in the device’s OS if management access is available (
shutdowncommand in Cisco IOS/NX-OS, disable port in GUI).Put on your grounded ESD wrist strap.
Identify the latch mechanism on the SFP module.
Disconnect the Cable:
Grasp the connector body (not the cable!) of the fiber optic or copper cable.
Depress the latch on the connector (for LC, SC types) and pull the connector straight out smoothly. Never pull the cable itself to remove the connector.
Immediately place dust caps on both the disconnected cable connector and the exposed optical bore(s) of the SFP module.
Release the Module Latch:
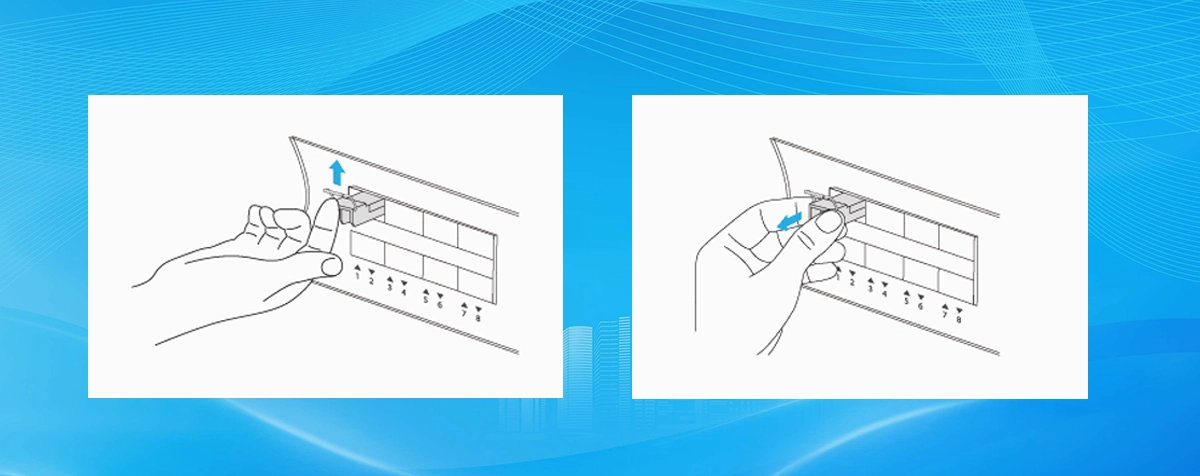
Locate the latch on the SFP module. This is typically a bail clasp (a fold-down handle) or a slide tab.
For a Bail Clasp: Gently pull the bail clasp down and away from the module body until it is fully extended (around 90 degrees). This action disengages the internal latch. Do not force it.
For a Slide Tab: Slide the tab towards the rear of the module (away from the connector end) or sometimes towards the connector end, depending on design. Slide it fully until it stops. You should feel the latch release.
Remove the Module:
While holding the latch in the released position (bail down/extended or tab slid), carefully grasp the sides of the SFP module and pull it straight out of the port using steady, even force. It should slide out smoothly.
Do not twist or rock the module. If it feels stuck, double-check that the latch is fully released. Never use excessive force.
Secure & Store:
Immediately place dust caps on the connector end of the removed SFP module.
If storing, place the module in an anti-static bag.
Visually inspect the now-empty port for any debris or bent pins (use a flashlight if necessary). Clean if needed using compressed air specifically designed for electronics.
Keywords Integrated: remove SFP module, SFP bail clasp, SFP latch release, fiber disconnection, SFP storage, safe transceiver removal
➤ Troubleshooting Common SFP Installation Issues
No Link Light / Link Down:
Cause: Incorrect insertion (not fully seated), dirty connectors, module failure, port shutdown/misconfiguration, cable fault, incompatible module/device, damaged port.
Fix: Reseat the module firmly. Thoroughly clean fiber connectors at both ends. Verify port configuration/enablement. Try a known-good cable. Try the module in another compatible port/device. Check vendor compatibility lists. LINK-PP offers extensive compatibility guarantees.
Intermittent Link / High Errors:
Cause: Dirty connectors, slightly unseated module/cable, damaged fiber, faulty module, marginal signal strength (especially over long distances), EMI.
Fix: Clean connectors meticulously. Reseat module and cables. Inspect cables for kinks/damage. Check signal levels via device diagnostics (if available). Replace suspect cable. Try a different module.
Module Not Recognized by Device:
Cause: Incompatible module, unsupported speed/type, poor contact due to dirt/damage, port failure, device software bug/restriction.
Fix: Verify strict compatibility with device vendor’s list. Try a vendor-branded module if possible (though compatible third-party like LINK-PP usually works). Reseat module. Clean contacts carefully with isopropyl alcohol on a swab if very dirty (use extreme caution). Try a different port. Check for firmware updates for the device. LINK-PP PRO Series modules often bypass restrictive vendor coding.
Physical Damage During Installation/Removal:
Cause: Forcing the module (wrong orientation), breaking the latch, damaging connector pins/bores.
Fix: Prevention is key! Always follow orientation guides and never force it. If damage occurs, the module or port may need replacement. Handle LINK-PP modules with care to ensure longevity.
Keywords Integrated: SFP not working, SFP link down, SFP troubleshooting, SFP compatibility issues, dirty fiber connector, SFP not recognized
➤ Choosing the Right SFP Module: Why Quality Matters
Not all SFP modules are created equal. While cost-effective options exist, investing in high-quality modules like those from LINK-PP delivers significant benefits:
Reliability & Uptime: Rigorous manufacturing and testing minimize failures that cause network outages.
Performance: Meet or exceed specifications for signal integrity, jitter, and power consumption, ensuring stable high-speed links.
Compatibility: Extensive testing across major OEM platforms (Cisco, Juniper, HPE/Aruba, Dell, Brocade/Ruckus, etc.) ensures plug-and-play operation. Check LINK-PP’s compatibility tool online.
Extended Reach & Margin: Quality optics often provide better performance margins, extending usable distances over challenging fiber.
Warranty & Support: Reputable vendors stand behind their products. LINK-PP offers industry-leading warranties and technical support.
Reduced TCO: Fewer failures, less troubleshooting time, and longer lifespan translate to lower total cost of ownership than cheap alternatives.
Keywords Integrated: SFP module quality, reliable SFP transceiver, SFP compatibility, network uptime, SFP vendor comparison, best SFP modules
➤ Conclusion: Master SFP Handling for Network Reliability
Proper installation and removal of SFP modules are deceptively simple yet critical tasks for maintaining a robust, high-performance network infrastructure. By diligently following the steps outlined above – prioritizing ESD protection, correct orientation, careful latching, meticulous fiber cleaning, and safe handling – you significantly reduce the risk of costly hardware damage, frustrating link failures, and unnecessary downtime.
Choosing high-quality, compatible SFP modules like those from LINK-PP further enhances your network’s stability and performance. Remember, prevention is always better than troubleshooting. Develop good habits, equip yourself with the right tools (ESD strap, cleaners), and treat these essential optical components with the care they deserve.
Ready to Upgrade Your Network Optics with Confidence?
Experiencing SFP issues? Our troubleshooting section covers common fixes.
Unsure about compatibility? Explore LINK-PP’s extensive compatibility database to find the perfect module for your Cisco, Juniper, HPE, or Dell switch.
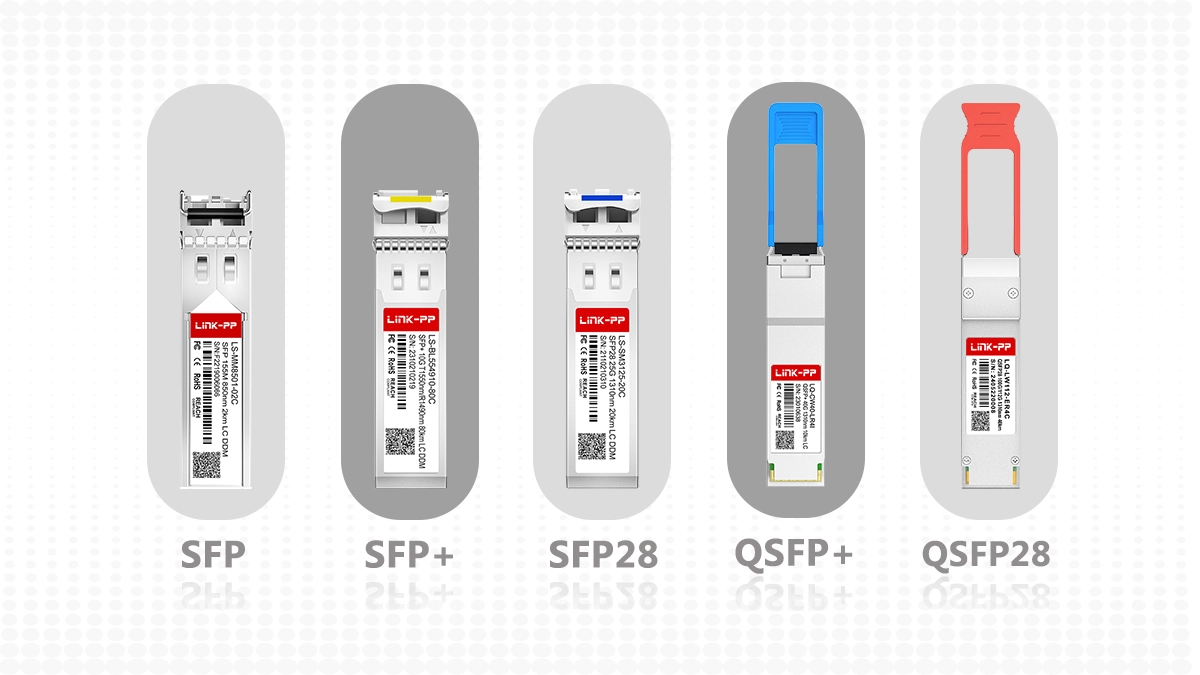
Need reliable, high-performance SFP, SFP+, QSFP+, or QSFP28 modules? Browse the full LINK-PP portfolio featuring industry-leading quality, competitive pricing, and robust warranties. Find the right solution for 1G, 10G, 25G, 40G, 100G, and beyond!
Have complex requirements? Contact the LINK-PP technical support team for expert advice tailored to your specific network needs.
Keywords Integrated: SFP best practices, network reliability, fiber optic maintenance, buy SFP modules, LINK-PP SFP, LINK-PP transceivers, SFP technical support
➤ FAQ
How do you know if an optical module is installed correctly?
Push the module in until you hear a click. Check for a green or blinking LED light on your device. If you see no light or a red light, take the module out and try again.
What should you do if an optical module feels stuck?
Stop and look at the latch. Open it gently without using too much force. If the module still will not move, check your device manual. Forcing it can break the port or the module.
Can you install or remove optical modules while the device is powered on?
Some devices let you swap modules while they are on. Always read your manufacturer’s guide first. If you are not sure, turn off the device before you add or remove any module.
How often should you clean optical connectors?
Clean connectors every time before you connect or unplug them. Use a fiber cleaning kit for the best results. Dirty connectors can make the signal weak and harm your equipment.
What is the best way to store unused optical modules?
Keep unused modules in anti-static bags or boxes. Put dust plugs on all ports. Store them in a clean, dry place away from sunlight. This keeps your modules safe and ready to use.