In the world of high-speed data transmission, Dense Wavelength Division Multiplexing (DWDM) is a game-changer, allowing multiple optical carrier signals to travel on a single fiber. The heart of this technology lies in its precision, specifically in the fiber channel spacing—the precise frequency or wavelength separation between these signals. Incorrect spacing can lead to crosstalk, signal degradation, and costly downtime.
This article provides a clear, step-by-step approach to measuring and verifying fiber channel spacing, ensuring your optical network operates at peak efficiency.
📝 Key Takeaways
Channel spacing means the space between optical channels. Knowing the right spacing stops signals from mixing. It also helps the system work well.
Use an optical spectrum analyzer (OSA) to check channel spacing. Plug in your fiber. Set the range. Measure the space between the peaks.
Look at your system’s datasheet for channel spacing numbers. This lets you check your measurements. It also helps you plan upgrades.
Keep your tools clean and set right. Doing regular checks makes measurements better. It also stops mistakes.
If you have problems, change the OSA resolution. Control the temperature. Clean the connectors to get better results.
📝 Why Fiber Channel Spacing Matters
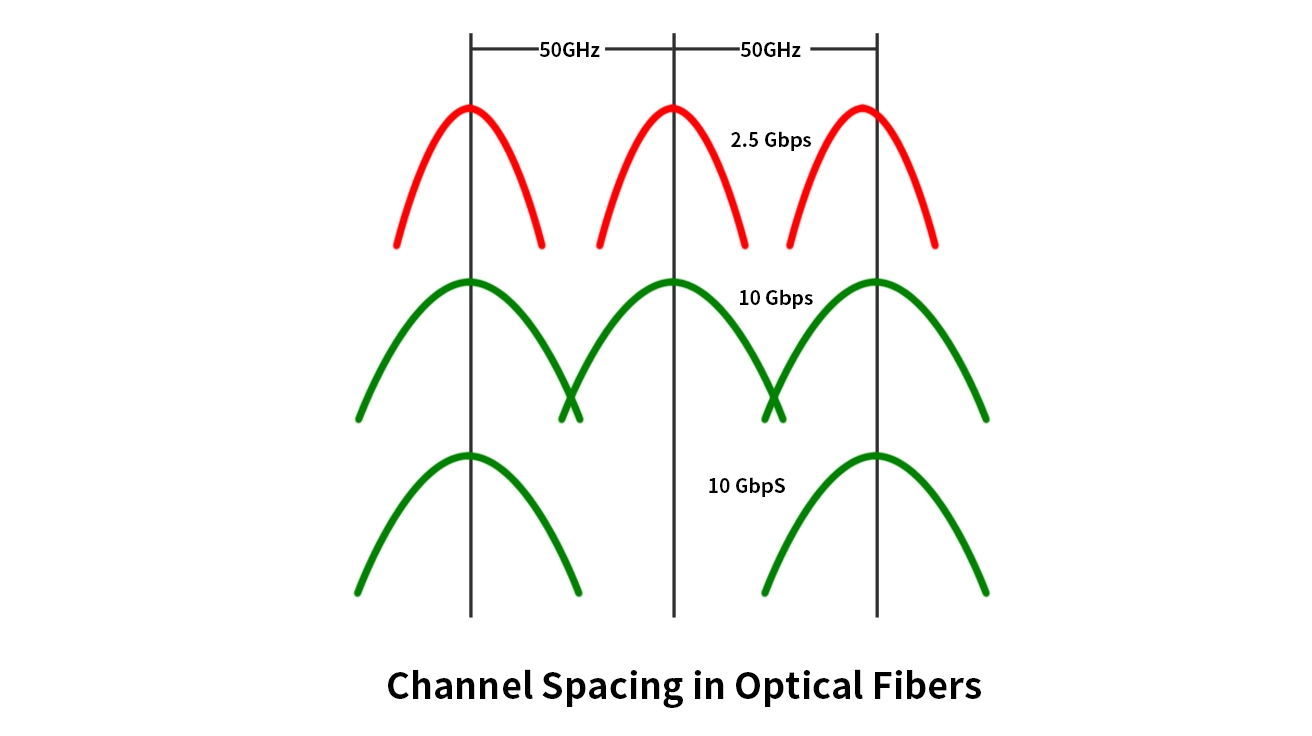
Think of fiber channel spacing like lanes on a highway. If the lanes are too narrow, cars (data signals) will collide. Standard DWDM systems typically use spacing of 100GHz (approx. 0.8nm) or 50GHz (approx. 0.4nm) in the C-band. Ultra-dense systems can even go down to 25GHz.
Accurate spacing is critical for:
Maximizing Bandwidth: Enables more channels per fiber.
Minimizing Crosstalk: Prevents adjacent channels from interfering with each other.
Ensuring Signal Integrity: Maintains the quality and integrity of the transmitted data.
📝 Essential Tools for Measurement
Before you begin, you’ll need the right equipment. The primary tool for this task is an Optical Spectrum Analyzer (OSA).
Tool | Primary Function | Key Metric Provided |
|---|---|---|
Optical Spectrum Analyzer (OSA) | Displays the power distribution of an optical signal as a function of wavelength. | Central Wavelength, Optical Signal-to-Noise Ratio (SNR), Channel Spacing. |
DWDM Source / Tunable Laser | Generates precise, stable wavelengths for testing. | Used as a reference signal. |
Step-by-Step: How to Measure Channel Spacing
Follow these steps to accurately measure the spacing between channels using an OSA.
Setup and Calibration: Connect the fiber output from your DWDM system to the input port of the OSA. Allow the OSA and the network equipment to warm up for stability. Perform a quick calibration of the OSA according to the manufacturer’s instructions to ensure baseline accuracy.
Capture the Optical Spectrum: Configure the OSA to scan the appropriate wavelength range (e.g., the C-band from 1530nm to 1565nm). Initiate the scan. You will see a spectrum display with distinct peaks representing each active DWDM channel.
Identify Channel Peaks: Use the OSA’s marker function to place markers on the peaks of adjacent channels. The OSA will automatically display the wavelength (in nm) or frequency (in GHz) for each peak.
Calculate the Spacing: The OSA will typically calculate the difference between the two markers automatically.
In Wavelength (λ): Subtract the wavelength of the first channel from the wavelength of the second (e.g., λ₂ – λ₁).
In Frequency (f): Subtract the frequency of the second channel from the frequency of the first (e.g., f₁ – f₂). Remember that frequency and wavelength have an inverse relationship.
Verify Against Standards: Compare the calculated spacing (e.g., 0.8 nm or 100 GHz) against your system’s design specification (ITU-T grid). Consistent deviation indicates a potential issue with the lasers or system configuration.
📝 The Critical Role of High-Quality Optical Transceivers
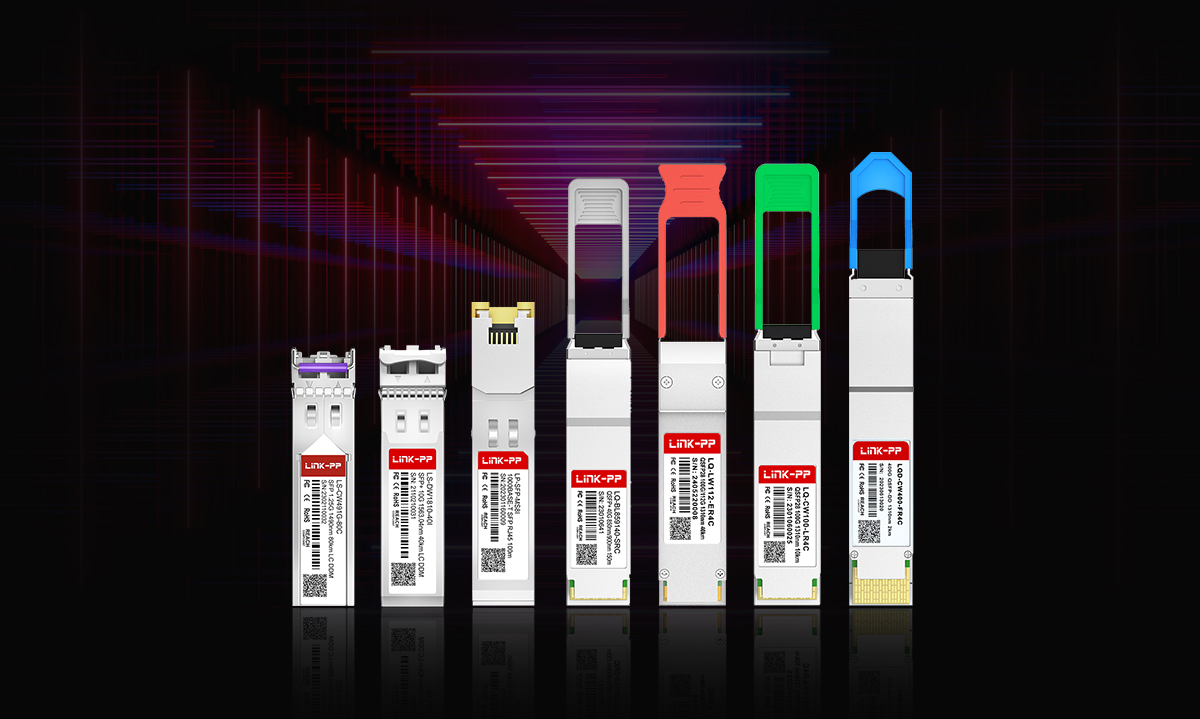
The accuracy of your DWDM channel spacing starts at the source: the optical transceiver. A poorly manufactured transceiver with wavelength drift is a primary culprit for spacing violations. When asking how to choose the right DWDM SFP+, stability and precision are non-negotiable.
What to look for in a DWDM transceiver:
Wavelength Stability: It must maintain its specified wavelength across its operational temperature range.
Low Chirp: Minimizes spectral broadening, which can unintentionally encroach on adjacent channels.
High OSNR: A good signal-to-noise ratio is essential for clear signal detection.
Investing in quality components, like those from reputable manufacturers, is the first line of defense in maintaining proper channel alignment. For instance, ensuring your DWDM SFP+ transceiver is compatible with your existing infrastructure prevents a host of performance issues.
Ensuring Long-Term Stability with LINK-PP Transceivers
For network engineers who cannot afford downtime, partnering with a reliable supplier is key. This is where the performance of LINK-PP optical transceivers shines. Engineered for exceptional wavelength accuracy and thermal stability, LINK-PP modules are designed to lock precisely onto the ITU grid.
For example, the LINK-PP 10G DWDM SFP+ LC 40km Transceiver (Model: LP-DWxx10-40I) is an excellent choice for demanding applications. The ‘xx’ in the model number corresponds to the specific ITU-T channel (e.g., “39” means CH39 for 1546.12nm), guaranteeing it meets the strict spacing requirements right out of the box. Using such a precision component simplifies the measurement and maintenance of your fiber channel spacing, as the transceiver itself becomes a reliable reference point.
📝 Conclusion: Precision is Paramount
Measuring fiber channel spacing is not a one-time task but an integral part of optical network health monitoring. By using an OSA correctly and understanding the critical role of stable transceivers, you can ensure your network delivers the high performance and reliability your business depends on.
Regular verification acts as a preventative measure, saving you from troubleshooting complex network failures later.
📝 FAQ
How do you know if your channel spacing is correct?
Look at your system’s datasheet for the right spacing. Use an optical spectrum analyzer to check the space between peaks. If your numbers match the datasheet, your spacing is right.
What tools can you use to measure channel spacing?
You can use an optical spectrum analyzer. You can also use manual math with datasheet numbers. Some special software tools can help too. Each tool finds the spacing in its own way.
Why does channel spacing matter in DWDM systems?
Channel spacing stops signals from mixing together. If channels are too close, signals can mix and cause mistakes. Good spacing keeps your network working well and stops interference.
Can you measure channel spacing without an optical spectrum analyzer?
Yes, you can. Use the frequency or wavelength numbers from your datasheet. Subtract one number from the next to get the spacing.
What should you do if your measured spacing does not match the datasheet?
First, check if your equipment is set up right. Clean all the connectors. Make sure you are using the right way to measure. If you still have trouble, ask your equipment provider for help.