SFP issues are among the most common and frustrating problems in fiber optic and Ethernet networking environments. Whether you are dealing with a no link light, intermittent connectivity (link flapping), or a transceiver not detected error, the root cause is often not immediately obvious. In many cases, the problem is not a single component failure but a combination of compatibility mismatches, fiber contamination, incorrect installation, or optical signal loss.
In modern data center and enterprise networks, SFP modules play a critical role in ensuring stable high-speed connectivity. However, even minor issues such as a dirty fiber connector, a wrong wavelength selection, or an unsupported third-party transceiver can lead to complete link failure or unstable performance.
This guide is designed to help network engineers, IT administrators, and procurement teams quickly identify, diagnose, and resolve common SFP issues. You will learn how to distinguish between hardware failure and configuration problems, how to verify SFP compatibility, and how to test optical performance using practical, field-proven methods.
By the end of this article, you will have a clear troubleshooting framework that reduces downtime, prevents unnecessary hardware replacement, and improves long-term network reliability.
🔷 Common SFP Issue Symptoms and What They Mean
SFP issues usually present themselves through a small set of recognizable symptoms. Understanding these early signals is critical because most failures are not random—they are typically caused by physical layer problems, compatibility mismatches, or optical signal degradation. Below is a breakdown of the most common SFP-related symptoms and what they actually indicate in real network environments.
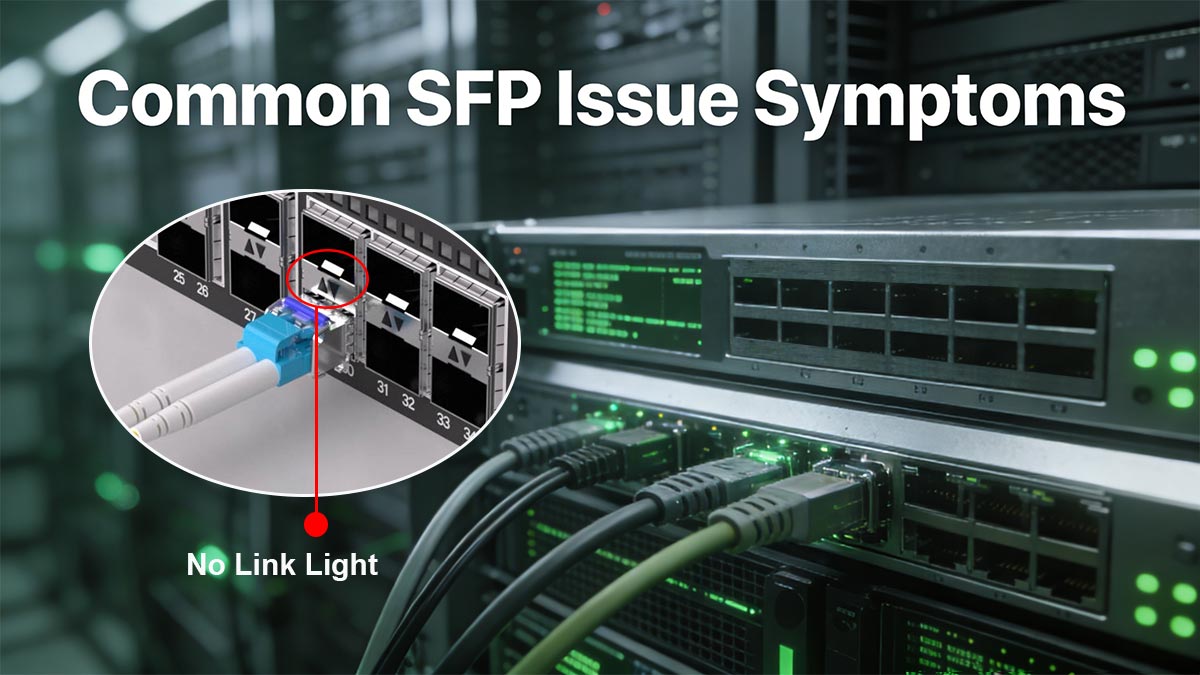
1. No Link Light (Link Down / Port Not Up)
This is the most common and most alarming SFP issue.
What you see:
No LED activity on the switch port
Interface stays “down/down”
SFP may show “not present” or “unsupported”
What it usually means:
The SFP is not properly seated in the slot
The module is incompatible with the device
Fiber patch cable is not connected or is defective
Incorrect fiber type (SMF vs. MMF mismatch)
Hardware failure in the SFP or switch port
Key insight:
If the switch does not detect the SFP at all, the issue is more likely hardware recognition or compatibility, not optical power.
2. Link Flapping (Intermittent Up/Down Connection)
What you see:
Interface repeatedly goes up and down
Unstable connectivity for users or services
Packet loss during active sessions
What it usually means:
Weak or unstable optical signal (low Rx power)
Dirty or contaminated fiber connectors
Slightly bent or damaged fiber cable
Loose SFP seating or unstable port contact
Marginal compatibility between transceiver and switch
Key insight:
Link flapping is often a signal integrity problem, not a complete failure. Small losses in optical budget can trigger instability even when the link appears “mostly working.”
3. SFP Not Detected or “Unsupported Transceiver” Error
What you see:
“Transceiver not recognized”
“Unsupported module” warning
Port disabled or error-disabled state
What it usually means:
Vendor lock-in or whitelist restriction (common in enterprise switches)
Third-party SFP not accepted by the device
Firmware or IOS mismatch
Incompatible SFP type (speed, form factor, or protocol mismatch)
Key insight: This is not a fiber issue—it is almost always a compatibility or vendor validation problem.
4. Low Optical Power (Tx/Rx Power Out of Range)
What you see (via diagnostics/CLI):
Rx power below threshold
Tx power abnormal or zero
Optical warning alarms
What it usually means:
Dirty fiber connectors causing signal loss
Excessive cable distance or high attenuation
Damaged fiber cable or patch panel loss
Misaligned fiber polarity (Tx/Rx swapped)
Degrading SFP laser transmitter
Key insight:
Low optical power is one of the most diagnostic-friendly SFP issues because it directly reflects physical layer signal quality.
5. High Error Rates or Packet Drops (Without Link Down)
What you see:
CRC errors increasing
Packet retransmissions
Slow or inconsistent throughput
What it usually means:
Marginal optical signal (borderline Rx power)
Electromagnetic interference in copper-based SFPs (RJ45 modules)
Poor-quality or aging fiber cables
Intermittent connector contamination
Key insight: Unlike link down, this indicates the connection is “alive but unhealthy,” often leading to performance degradation before complete failure.
Quick Interpretation Summary
Symptom | Most Likely Cause | Severity |
|---|---|---|
No link light | Compatibility / seating / hardware failure | High |
Link flapping | Dirty fiber / weak signal / cable issues | Medium–High |
Not detected / unsupported | Vendor lock or mismatch | High |
Low optical power | Fiber loss / contamination / distance | Medium |
Packet errors | Marginal signal quality | Medium |
Most SFP issues are not random hardware failures—they are predictable physical-layer or compatibility problems. By correctly identifying the symptom first, you can usually narrow the root cause down to fiber cleanliness, signal strength, or transceiver compatibility within minutes, instead of replacing hardware blindly.
🔷 Why SFP Modules Fail: The Most Common Causes
SFP failures are rarely caused by a single factor. In real-world enterprise and data center environments, most “SFP issues” are the result of layer-1 physical problems, compatibility mismatches, or environmental stress over time. Understanding these root causes is essential for reducing downtime and avoiding unnecessary module replacements.
1. Dirty or Contaminated Fiber Connectors (Most Common Cause)
One of the leading causes of SFP issues is contamination on the fiber end face.
Why it causes failure:
Even microscopic dust particles can block or scatter laser light, significantly reducing optical signal strength and causing link instability.
Typical symptoms:
Link flapping
Low Rx optical power
Intermittent connectivity
Complete link failure after re-plugging
Where contamination happens:
Fiber patch cords exposed to air
Uncapped connectors during installation
Dust inside switch SFP ports
Key insight:
Most “bad SFPs” are actually cleaning problems, not hardware defects.
2. Compatibility Mismatch (Speed, Wavelength, or Vendor Lock)
Compatibility issues are extremely common in modern mixed-vendor networks.
Why it causes failure:
SFP modules must match:
Speed (1G, 10G, 25G, etc.)
Wavelength (850nm, 1310nm, etc.)
Fiber type (Single-mode vs. Multimode)
Vendor compatibility rules (Cisco/HP/Arista restrictions)
Typical symptoms:
“Unsupported transceiver” error
Port disabled or error-disabled state
No link light despite correct cabling
Key insight: Even a technically correct SFP may fail if it is not approved or recognized by the switch firmware.
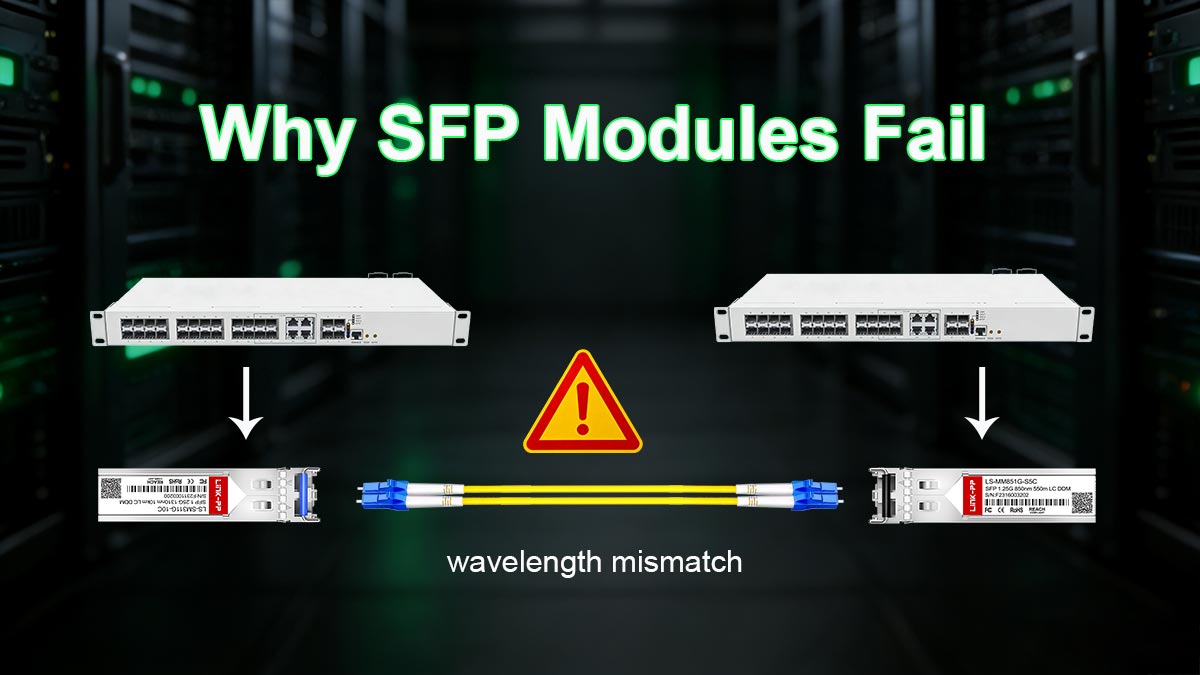
3. Improper Fiber Type or Wavelength Mismatch
A very common deployment mistake is mixing fiber types or optics.
Why it causes failure:
Single-mode SFP used on multimode fiber (or vice versa)
Mismatched wavelength pairs (e.g., 1310nm vs 1550nm mismatch)
Incorrect transceiver pairing at both ends
Typical symptoms:
Weak or no link
Extremely low optical power
Unstable or one-way communication
Key insight:
Fiber mismatch often produces partial or unstable links rather than complete failure, making it harder to detect.
4. Physical Damage to Fiber or Connector Ends
Fiber optic cables are sensitive to physical stress.
Why it causes failure:
Bent fiber exceeding bend radius limits
Cracked connectors or misaligned ferrules
Damaged patch panels or couplers
Typical symptoms:
Sudden link drop after movement
Intermittent flapping when cable is touched
Increasing bit errors over time
Key insight: Fiber damage is often mechanical and progressive, not immediate.
5. Poor SFP Seating or Loose Installation
Even a perfectly functional SFP can fail if not properly installed.
Why it causes failure:
Module not fully inserted into the cage
Locking latch not secured
Slight movement causing intermittent contact
Typical symptoms:
Random link up/down events
SFP not detected intermittently
Works after reseating temporarily
Key insight: This is one of the simplest but most overlooked causes of SFP issues.
6. Optical Power Budget Exceeded
Every fiber link has a maximum loss threshold.
Why it causes failure:
Cable length exceeds specification
Too many patch panels or connectors in the path
Signal attenuation exceeds SFP Tx power capability
Typical symptoms:
Low Rx power warnings
Link instability over distance
Failure only at longer cable runs
Key insight: Even high-quality SFPs cannot compensate for excessive optical loss in the link path.
7. Aging or Defective SFP Hardware
Although less common than environmental issues, SFP Transcivers can fail over time.
Why it causes failure:
Laser degradation (Tx power drop)
Internal circuit failure
Heat stress in high-density switches
Typical symptoms:
Gradual performance degradation
Increasing optical alarms
Failure across multiple cables (same SFP)
Key insight:
If multiple known-good cables fail on the same module, the SFP is likely defective.
Most SFP failures fall into five dominant categories:
Contamination (fiber cleanliness)
Compatibility mismatch (vendor/speed/wavelength)
Fiber physical damage
Installation issues
Optical budget exceedance
Only a smaller portion of cases are due to actual hardware failure of the SFP module itself. This is why systematic troubleshooting is essential before replacement.
🔷 How to Troubleshoot SFP Issues Step by Step
Effective SFP troubleshooting follows a layered diagnostic approach, moving from the simplest physical checks to deeper optical and configuration validation. This prevents unnecessary replacement of modules and quickly isolates whether the issue is related to fiber, SFP hardware, switch configuration, or compatibility.
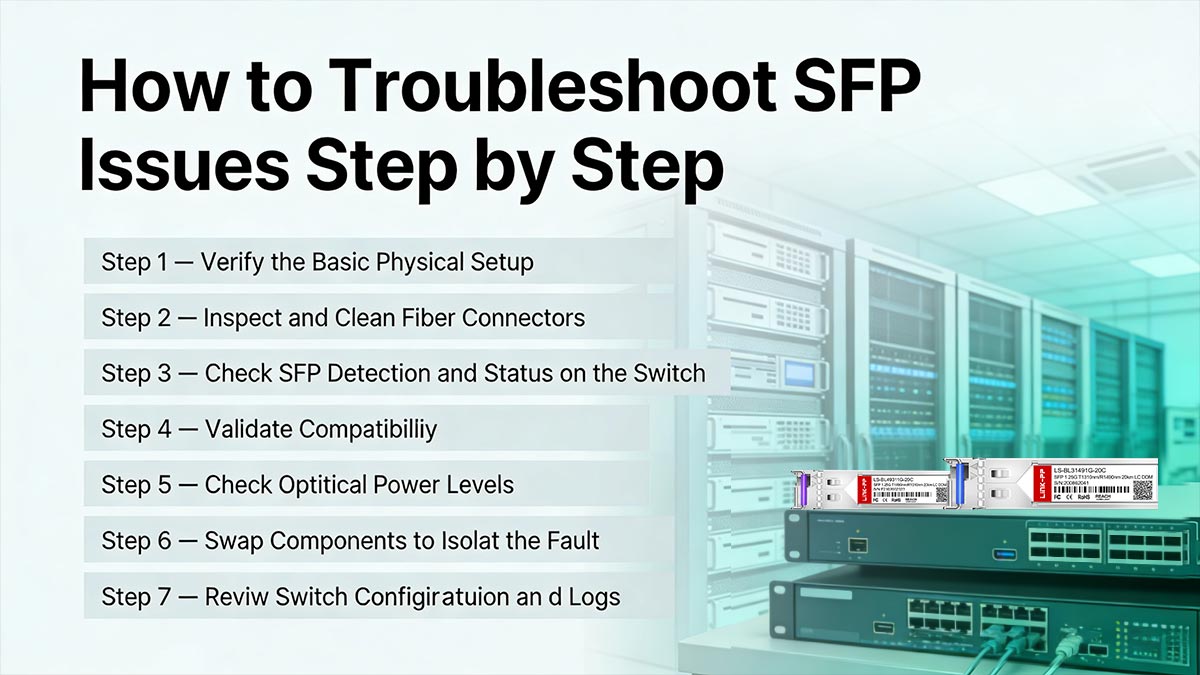
Below is a practical, field-tested step-by-step workflow used in enterprise and data center environments.
Step 1 — Verify the Basic Physical Setup
Start with the simplest checks before diving into diagnostics.
What to check:
Is the SFP fully inserted into the slot?
Is the locking latch secured?
Are both fiber connectors properly plugged in?
Are TX and RX correctly crossed (TX → RX, RX → TX)?
Why this matters:
A significant percentage of “SFP failures” are actually installation or cabling mistakes, not hardware issues.
Quick result interpretation:
If the link comes up after reseating → installation issue
If nothing changes → continue troubleshooting
Step 2 — Inspect and Clean Fiber Connectors
Fiber contamination is one of the most common root causes.
What to do:
Inspect connectors using a fiber scope (if available)
Clean both ends using proper fiber cleaning tools
Re-seat the connectors after cleaning
What to look for:
Dust particles
Oil residue from handling
Scratches or damaged ferrules
Why this matters:
Even microscopic contamination can significantly reduce optical signal strength and cause link flapping or no link condition.
Step 3 — Check SFP Detection and Status on the Switch
Use CLI or management interface to confirm whether the switch recognizes the module.
Typical checks include:
Interface status (up/down)
Transceiver detection
Vendor/model recognition
Error-disabled state
What results indicate:
“Not detected” → hardware seating or compatibility issue
“Unsupported transceiver” → vendor lock or mismatch
Detected but down → likely fiber or optical issue
Why this matters:
This step separates hardware recognition issues from physical layer issues.
Step 4 — Validate Compatibility (Speed, Wavelength, Fiber Type)
Ensure all components in the link are aligned.
Check the following:
SFP speed (1G vs. 10G vs. 25G)
Wavelength match (e.g., 850nm vs. 1310nm)
Fiber type (Single-mode vs. Multimode)
Switch vendor compatibility rules
Common mistakes:
Using SFP+ in an SFP-only port
Mixing SMF and MMF fiber
Using unsupported third-party optics
Why this matters:
Compatibility issues often produce no link or persistent detection errors, even when hardware is healthy.
Step 5 — Check Optical Power Levels (Tx/Rx Diagnostics)
If the SFP is detected but the link is unstable, check optical performance.
What to monitor:
Rx power (incoming signal strength)
Tx power (outgoing signal strength)
Temperature and voltage (if available)
Interpretation:
Low Rx power → fiber loss, dirty connectors, or long distance
Zero Tx power → SFP transmitter failure
Out-of-range values → potential hardware degradation
Why this matters:
Optical diagnostics provide direct visibility into signal health across the fiber path.
Step 6 — Swap Components to Isolate the Fault
Isolation testing is one of the most reliable troubleshooting methods.
Swap in this order:
Replace fiber patch cable
Swap SFP module with a known-good unit
Test in a different switch port
How to interpret results:
Problem follows the cable → fiber issue
Problem follows the SFP → module failure
Problem stays at port → switch hardware issue
Why this matters:
This step removes guesswork and confirms the actual failing component.
Step 7 — Review Switch Configuration and Logs
Finally, verify system-level settings.
Check for:
Error-disabled ports
Speed/duplex mismatches
Auto-negotiation issues
Interface shutdown states
System logs showing transceiver errors
Why this matters:
Some SFP issues are not physical at all but caused by software or configuration states blocking the link.
A proper SFP troubleshooting process always follows this logic:
Physical check → Clean fiber → Verify detection → Validate compatibility → Check optical power → Swap components → Review configuration
Most issues are resolved in the first three steps, while deeper testing is only needed for persistent or complex failures. This structured approach significantly reduces downtime and prevents unnecessary hardware replacement.
🔷 How to Test Whether an SFP Is Working
Testing whether an SFP is functioning correctly requires more than simply checking if a link is “up.” In real network environments, an SFP can appear operational while still performing poorly due to low optical power, marginal signal quality, or intermittent hardware faults. A proper validation process combines physical inspection, switch diagnostics, optical measurements, and real traffic testing.
Below is a practical, field-oriented testing framework used by network engineers to confirm SFP health.
Step 1 — Confirm Physical Link Status (Basic Validation)
Start with the simplest indicator: the link state.
What to check:
Switch port status shows up/up
Link LED is active (green or blinking depending on device)
No immediate link down events after connection
What it tells you:
The SFP is physically recognized
Fiber path is at least partially functional
Basic TX/RX light transmission is occurring
Limitation:
A link-up state does not guarantee performance quality, only basic connectivity.
Step 2 — Verify SFP Detection in the Switch
Use switch CLI or management tools to confirm module recognition.
Check for:
SFP model and vendor detection
Speed and interface type (1G / 10G / SFP / SFP+)
Error messages such as:
“unsupported transceiver”
“module not present”
Interpretation:
Properly detected SFP → hardware is recognized and initialized
Not detected → seating issue, hardware failure, or incompatibility
Why this matters:
If the device cannot identify the SFP, further optical testing is unnecessary until this is resolved.
Step 3 — Check Optical Power Levels (Tx/Rx Testing)
This is one of the most important tests for SFP health.
What to measure:
Tx Power (Transmit): Light sent from the SFP
Rx Power (Receive): Light received from the remote end
Typical tools:
Switch CLI commands (e.g., transceiver diagnostics)
Network monitoring dashboards
Optical power meters (advanced testing)
How to interpret results:
Normal Tx/Rx range → SFP and fiber path are healthy
Low Rx power → fiber loss, dirty connectors, long distance
Zero Tx power → possible SFP transmitter failure
Fluctuating values → unstable optical or hardware issue
Key insight:
Optical power testing is the most reliable indicator of real SFP performance health.
Step 4 — Perform a Fiber Loopback Test (Isolation Test)
Loopback testing helps isolate whether the SFP or fiber path is failing.
How it works:
Connect the SFP to a loopback adapter or loop fiber back to itself (if supported)
The device sends and receives signal through the same module
What it tells you:
If loopback works → SFP transmitter and receiver are functional
If loopback fails → SFP hardware likely defective
If loopback works but link fails in production → external fiber issue
Why this matters:
This test removes external variables and isolates the SFP module itself.
Step 5 — Test with a Known-Good Fiber Cable
Cable issues are often mistaken for SFP failure.
Procedure:
Replace existing fiber patch cable with a verified working one
Re-test link and optical power
Results interpretation:
Issue resolved → original fiber cable is faulty or contaminated
No change → SFP or switch port issue remains likely
Key insight:
A large percentage of SFP “failures” are actually fiber cable degradation or contamination issues.
Step 6 — Swap the SFP Module (A/B Comparison Test)
This is one of the most definitive validation steps.
Procedure:
Replace suspect SFP with a known-good module of identical specification
Observe link behavior and optical readings
Outcomes:
Problem disappears → original SFP is faulty
Problem persists → issue is fiber, configuration, or switch port
Why this matters:
This is the fastest way to confirm hardware-level failure vs. environmental issue.
Step 7 — Validate Real Traffic Stability
A working link is not enough; it must be stable under load.
What to test:
Continuous ping tests
Throughput tests (iperf or similar tools)
Error counters (CRC, drops, retransmissions)
What to watch for:
Packet loss under load
Increasing error counters
Latency spikes or jitter
Why this matters:
Some SFPs pass basic link tests but fail under real traffic stress, indicating marginal optical performance.
A properly functioning SFP should meet all of the following conditions:
Detected correctly by the switch
Stable link status (no flapping)
Tx/Rx optical power within acceptable range
No significant error counters
Stable performance under traffic load
If any of these conditions fail, the issue is likely not just “working vs not working,” but a deeper optical, compatibility, or hardware degradation problem.
This structured testing approach ensures accurate diagnosis and prevents unnecessary replacement of working modules.
🔷 SFP Compatibility Checklist Before You Replace the Module
Before replacing an SFP module, it is critical to verify compatibility across the entire optical link. In many real-world cases, the SFP itself is not faulty—issues are caused by mismatched specifications, vendor restrictions, or incorrect fiber pairing. A structured compatibility check helps eliminate unnecessary replacements and reduces network downtime.

1. Verify SFP Speed and Port Type Match
One of the most common compatibility mistakes is using the wrong speed class.
Check the following:
Switch port capability (does it support the inserted module speed?)
Auto-negotiation support (if applicable)
Common issues:
10G SFP+ inserted into a 1G-only port
Port locked to a fixed speed that does not match the module
Why it matters:
Speed mismatch often results in no link or unsupported module errors, even if the hardware is physically fine.
2. Confirm Fiber Type Compatibility (Single-Mode vs. Multimode)
Fiber type mismatch is a frequent root cause of SFP issues.
Check:
Single-mode fiber (SMF) vs. Multimode fiber (MMF)
Typical problems:
Why it matters:
Optical signals are designed for specific fiber cores, and mismatches lead to high attenuation and signal loss.
3. Match Wavelength Across the Link
Both ends of a fiber link must use compatible wavelengths.
Check:
850nm (short range, MMF)
1310nm (common LR applications)
1550nm (long range applications)
Common mistake:
Using mismatched SFP pairs on each end of the fiber
Why it matters:
Wavelength mismatch results in no light detection or extremely weak Rx power, even if all other components are correct.
4. Check Vendor Compatibility and Device Restrictions
Modern switches often enforce strict optics validation.
Check for:
Vendor-specific SFP whitelist (Cisco, Arista, Juniper, etc.)
“Unsupported transceiver” warnings
Firmware restrictions on third-party optics
Typical outcomes:
Module is physically functional but blocked by firmware
Port remains down despite correct configuration
Why it matters:
Many “failed SFPs” are actually policy-restricted optics, not defective hardware.
5. Validate Connector and Cable Type
Even compatible SFPs will fail if paired with incorrect cabling.
Check:
LC vs SC connector type compatibility
Correct polarity (Tx → Rx, Rx → Tx)
Fiber patch cord condition and cleanliness
Common issues:
Reversed fiber pairs
Damaged or contaminated connectors
Incorrect patch panel configuration
Why it matters:
Cable mismatch is often mistaken for module failure, especially in new deployments.
6. Ensure Distance and Optical Budget Compliance
Every SFP has a defined transmission limit.
Check:
Maximum supported distance (e.g., 300m, 10km, 40km)
Total link loss (connectors + fiber + patch panels)
Optical budget margin
Typical problems:
Fiber run exceeds SFP specification
Excessive connectors reduce signal strength
Insufficient Tx power for long-distance links
Why it matters:
Even perfectly matched SFPs will fail if the optical budget is exceeded.
7. Confirm Firmware and Hardware Support
Switch firmware and hardware revisions can impact SFP compatibility.
Check:
Switch OS version supports installed SFP
Hardware revision compatibility matrix
Required firmware upgrades for newer optics
Common symptoms:
Intermittent detection
Unsupported module warnings after upgrade
Previously working SFP stops functioning
Why it matters:
Compatibility is not only physical—it is also software-defined in modern networking platforms.
Before replacing an SFP, always validate:
Speed and port compatibility
Fiber type (SMF vs. MMF)
Wavelength matching
Vendor restrictions
Cable integrity and polarity
Optical budget limits
Firmware and hardware support
In many cases, resolving a compatibility issue restores full operation without replacing the SFP, saving both time and cost while improving long-term network stability.
🔷 When to Replace the SFP, Cable, or Switch Port
In SFP troubleshooting, one of the most important decisions is determining what actually needs to be replaced. Blindly swapping the SFP often wastes time and budget because the root cause may lie in the fiber cable or the switch port itself. A structured decision framework helps isolate the faulty component with high confidence.
▶ When to Replace the SFP Module
Replace the SFP only after confirming it is the likely source of failure.
Strong indicators the SFP is faulty:
Same SFP fails across multiple known-good cables
Optical diagnostics show zero Tx power
Persistent “no link” even after reseating and cleaning
Link works intermittently across different ports and fibers
SFP overheats or shows abnormal voltage/temperature readings
Validation method:
Swap with a known-good identical SFP
If the issue disappears immediately → original module is defective
Key insight:
True SFP hardware failure is less common than fiber or compatibility issues, but it becomes likely when the fault follows the module across different environments.
▶ When to Replace the Fiber Cable
Fiber cables are one of the most frequent hidden causes of SFP issues.
Replace the cable when you observe:
High or unstable Rx power loss
Visible physical damage (bends, cracks, crushed jacket)
Intermittent link flapping when cable is moved
Dirty or scratched connectors that cannot be cleaned
Link works only after repositioning the cable
Validation method:
Replace with a certified known-good patch cable
If link stabilizes → original fiber is faulty
Key insight: Fiber damage is often mechanical and progressive, meaning performance may degrade over time before complete failure occurs.
▶ When to Replace the Switch Port
Switch port failure is less common but critical to identify correctly.
Strong indicators of port failure:
Multiple known-good SFPs fail in the same port
Multiple known-good cables also fail
SFP is correctly detected but link never comes up
Port shows persistent hardware errors or disables itself
Adjacent ports function normally while one port consistently fails
Validation method:
Move the SFP and fiber to a different switch port
If everything works → original port is faulty
Key insight:
Switch port failures are often caused by hardware damage, cage contamination, or internal transceiver interface faults.
▶ Decision Matrix (Fast Diagnosis Guide)
Scenario | Most Likely Fault | Action |
|---|---|---|
Problem follows SFP | SFP module | Replace SFP |
Problem follows cable | Fiber cable | Replace fiber |
Problem stays at one port | Switch port | Replace/repair switch |
Works after cleaning | Contamination | |
Works after reseating | Installation issue | Fix seating/connection |
▶ Practical Troubleshooting Logic Used by Engineers
In real deployments, engineers follow a simple isolation rule:
Change one variable at a time and observe whether the problem follows it.
This means:
Swap SFP → observe
Swap cable → observe
Swap port → observe
Why this works:
SFP issues are rarely random. They almost always follow a specific physical or logical component in the link.
Before replacing anything, always identify whether the problem is tied to:
The SFP module (failure follows the module)
The fiber cable (failure follows the cable)
The switch port (failure stays on the port)
This structured approach eliminates guesswork, reduces unnecessary replacements, and ensures faster restoration of network connectivity.
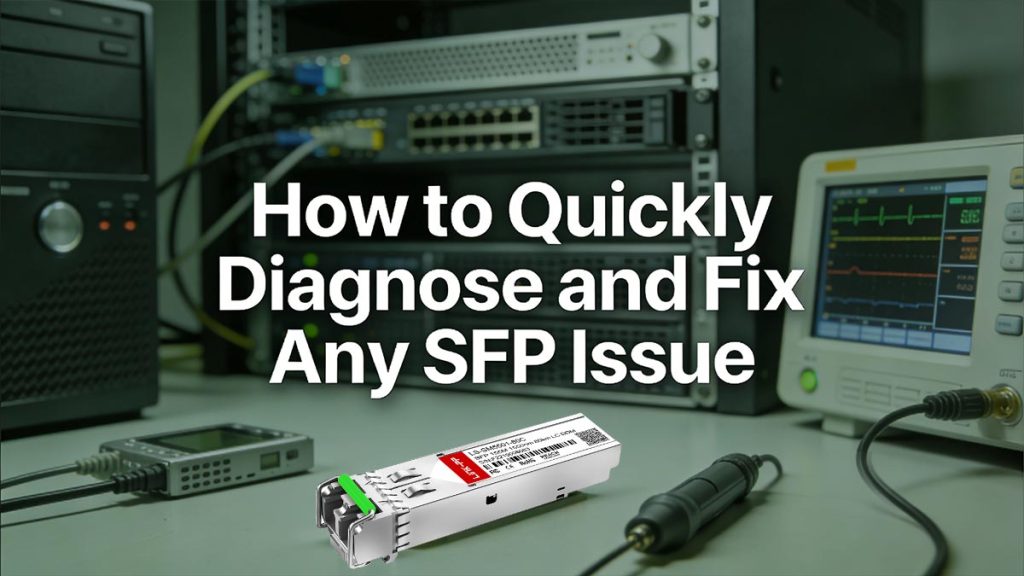
🔷 Conclusion — How to Quickly Diagnose and Fix Any SFP Issue
SFP issues may look complex at first, but in most real-world cases they follow a predictable pattern: physical layer problems, compatibility mismatches, or optical signal degradation. By applying a structured troubleshooting approach—starting from physical inspection, moving through compatibility validation, and finishing with optical diagnostics—you can quickly isolate the root cause without unnecessary module replacement.
Decision Framework Summary
When facing an SFP issue, use this simple engineering logic:
No link light or not detected → check seating, compatibility, or hardware recognition
Link flapping → inspect fiber cleanliness and optical signal stability
Low optical power → check fiber loss, distance, and connector quality
Unsupported transceiver → verify vendor compatibility and firmware restrictions
Persistent failure → isolate by swapping SFP, cable, and switch port
This structured approach reduces troubleshooting time and ensures you are replacing only the component that is truly defective—rather than guessing.
Final Recommendation
In modern networks, SFP reliability depends on more than just the module itself. The performance of the entire link—fiber quality, optical budget, compatibility rules, and switch validation logic—must all align.
For stable deployments, always choose verified, standards-compliant optical modules and high-quality fiber components to minimize downtime and long-term maintenance costs.
If you are sourcing reliable and fully tested transceivers, explore the LINK-PP Official Store, where you can find a wide range of compatible SFP solutions designed for enterprise-grade network stability and performance.